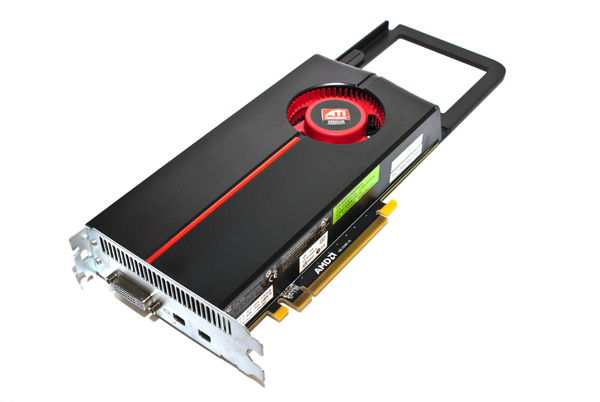
This is a simple guide to show you how to save your ATI HD 5770 Mac Edition card in case of a bad BIOS flashing. It seems this is a common problem in the classic Mac Pro users area. As they upgrade their graphics cards for the upcoming Mac OS X El Capitan (to have full Metal support on AMD GPUs 7xxx family and up), sometimes – like me – they end up with a small disaster by flashing the wrong card by mistake.
Well this ends today (at least for the ATI 5770 users).
In my case, I’ve flashed my ATI 5770 Mac Edition with the BIOS ROM of my XFX 7950 (see the previous guide). The card after the “supposedly successful BIOS flash” ended up a brick. The mistake I made was a number, instead of flashing the “1” card in atiflash, I flashed the “0” card. NOTE: ALWAYS USE atiflash -ai BEFORE YOU FLASH! Only that way you will know what GPU you’re going to flash. Forget all the guides around the net with the commands, give the above command so you’ll be sure what card YOUR COMPUTER sees in what position (number 0 or 1).
Maybe after the “-ai” to also give these to make sure: atiflash -i 0 and also with atiflash -i 1 and keep screenshots if you have to remember what cards is placed where…
So, let’s see how our card looks:
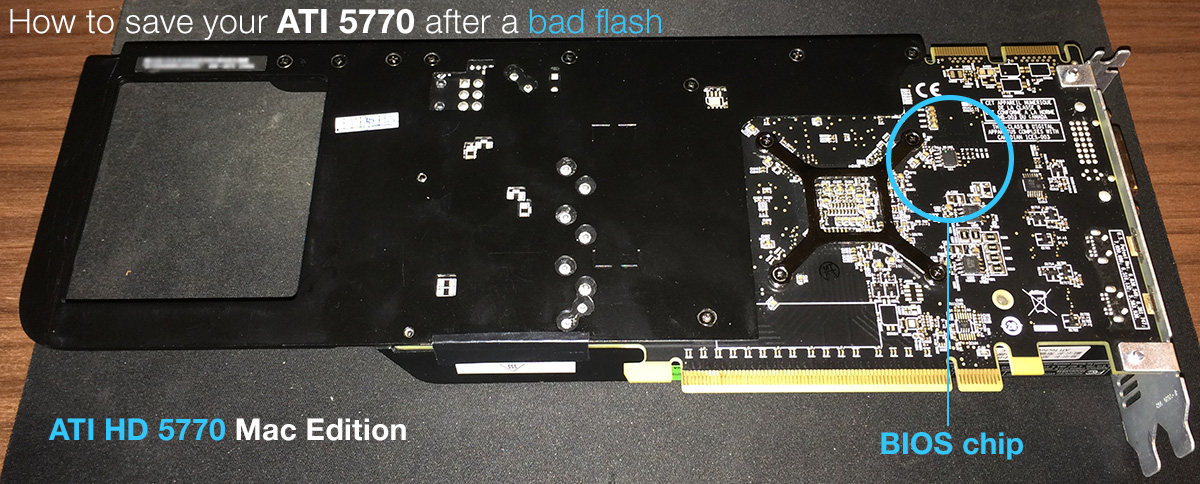
Locate the BIOS chip as seen in the picture. There is a green dot on the top left as seen in this view, this dot gives the pin number “1” to our counting for the upcoming steps.
The numbering is from top to bottom (in this view) 1,2,3,4 and the opposite side 8,7,6,5 as seen in this photo.
A closer look at the BIOS chip:
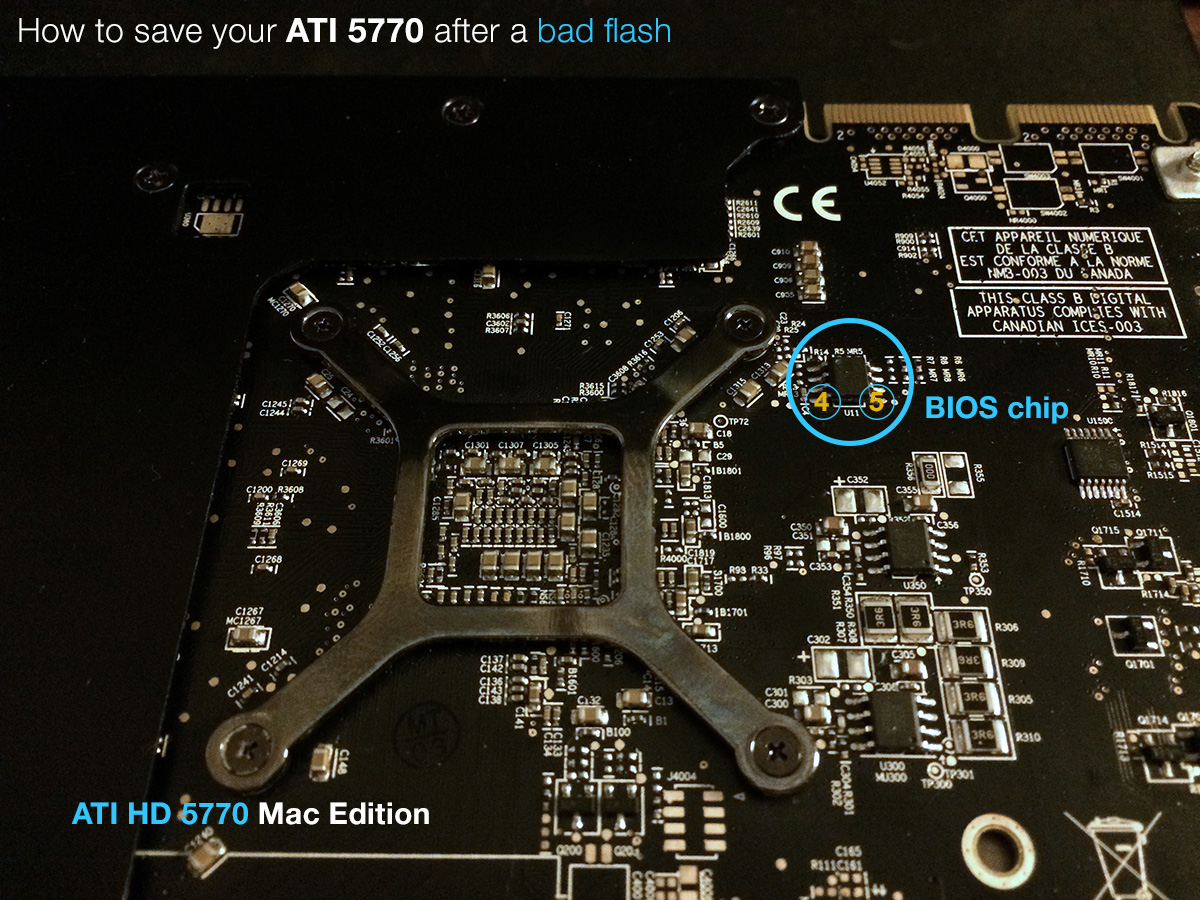
The pins with numbers 4 and 5 as seen above must be short circuited so we will be able to flash a new BIOS to our bricked ATI 5770 GPU card.
See below a detailed view:

Explanation of BIOS pins (provided by netkas)
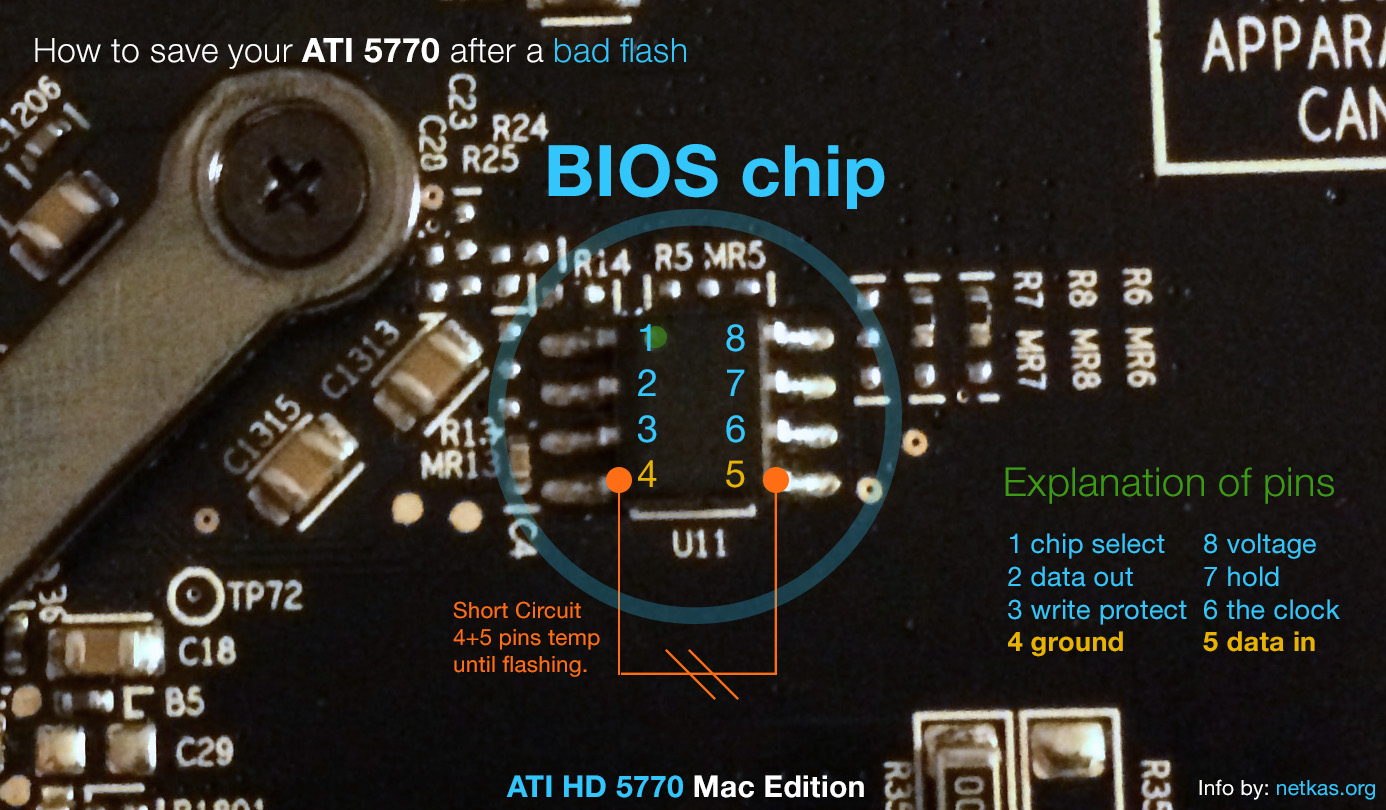
As seen here again the bottom 2 pins labeled in this picture with number 4 and 5 must be short circuited. I found very thin bronze cable and created the short circuit WITHOUT any soldering. The reason? Because during the computer operation YOU have to remove the short circuit to be able to flash with new BIOS your card. The short circuit bypasses the BIOS info to the computer and the card from brick becomes a VGA adapter without any Vendor or model (in Windows PC or Mac Pro with Bootcamp). All this info was provided by netkas in his blog here. The only difference is the pin numbers, instead of 1 and 4 a user “omni” reported to netkas, use 4 and 5 as I show you here. (Update: netkas has corrected the article 🙂 )
So, you put the card inside your Mac Pro or your PC, you will need another GPU to view what you’re doing, so there is no blind flashing here… Boot and in Windows disable using Task Manager all the AMD/ATI processes and also the Windows Driver Installation Process (Important!). If you don’t end those tasks, you will get Error ofl01 failed to read rom in both atiflash and atiwinflash. So better do this now.
Now since there is nothing bothering your bricked ATI 5770 card, let’s move on. Find Command Prompt (using search in Windows 7 or 8.1), right click and Run as Administrator.
In Desktop place a folder and call it 5770. Inside put your ATI 5770 Mac Edition rom, atiflash or atiwinflash (click the links to download them, unzip the EFI rom for your Mac Edition ATI 5770 ONLY!).
In Command Prompt (or DOS if you prefer) type: cd.. and then cd.. again, now you’re at C:\ (right?) good, now:
cd users
cd “your username goes here”
cd desktop
cd 5770
Normally now you’re seeing in the Command Prompt this: C:\Users\user\Desktop\5770\
Having your card with the short circuit as is type: atiflash -ai (you will see the adapter infos that tells you e.g. Adapter 0 JUNIPER blah blah and Adapter 1 your working GPU) IF you want to make sure that the Adapter 0 is the bricked ATI 5770, type: atiflash -ai 0 and see the confirmation, ONLY THEN you will move to the next step.
Now since you’re SURE that Adapter 0 is your bricked ATI 5770 card, remove/release the short circuit.

In Command Prompt type:
atiflash -unlockrom 0 (this unlocks the ROM so the card is ready to accept new ROM) Make sure you have the attached 5770.rom I provided in the same “5770” directory at your Desktop)
atiflash -f -p 0 5770.rom (the process will take some seconds, the computer flashes your card with the correct Mac EFI ROM now, if you have a PC version of 5770 this process will convert it to Mac Edition, so be aware of what you’re flashing in this guide!)
When the flashing finishes you’ll see a success report. Now, restart your computer and confirm that your card is recognized in the System Profiler menu under Graphics Card and PCI info. If everything appears OK, then you’re done! Enjoy your un-bricked ATI HD 5770 Mac Edition 🙂
I want to personally thank netkas for pointing me out to the right direction, without “blind flashing” or this crap I see around the internet. This guide I hope to save you some money and time, in my case, I spent 5 hours trying to figure out what and how to do this unbrick, the most difficult part is the short circuit, thank God I found some old wire that had very thin bronze like hair wires that I used to wrap each pin seperated (4 and 5), then covered them with some electrical tape and was able to release the short circuit during the operation. Make sure you have 2 very thin wires about 10-15cm long, so while the Mac or PC is operating, to be able to undo the short circuit WITHOUT short circuit any other chip/metal/component at your computer. I take no responsibility of your actions, you have been warned by me and also by netkas at his blog.
I wish you good luck and please leave feedback and questions you might have, below 🙂
Cheers and greetings from Greece!
-VAG
